The following text must be included in any distribution of derivatives of this board. All links must also be included.
Based on the incredible work by Dash n'Mash.
Copyright 2023 TheTrain
Changes from the original design:
- list any changes you make here
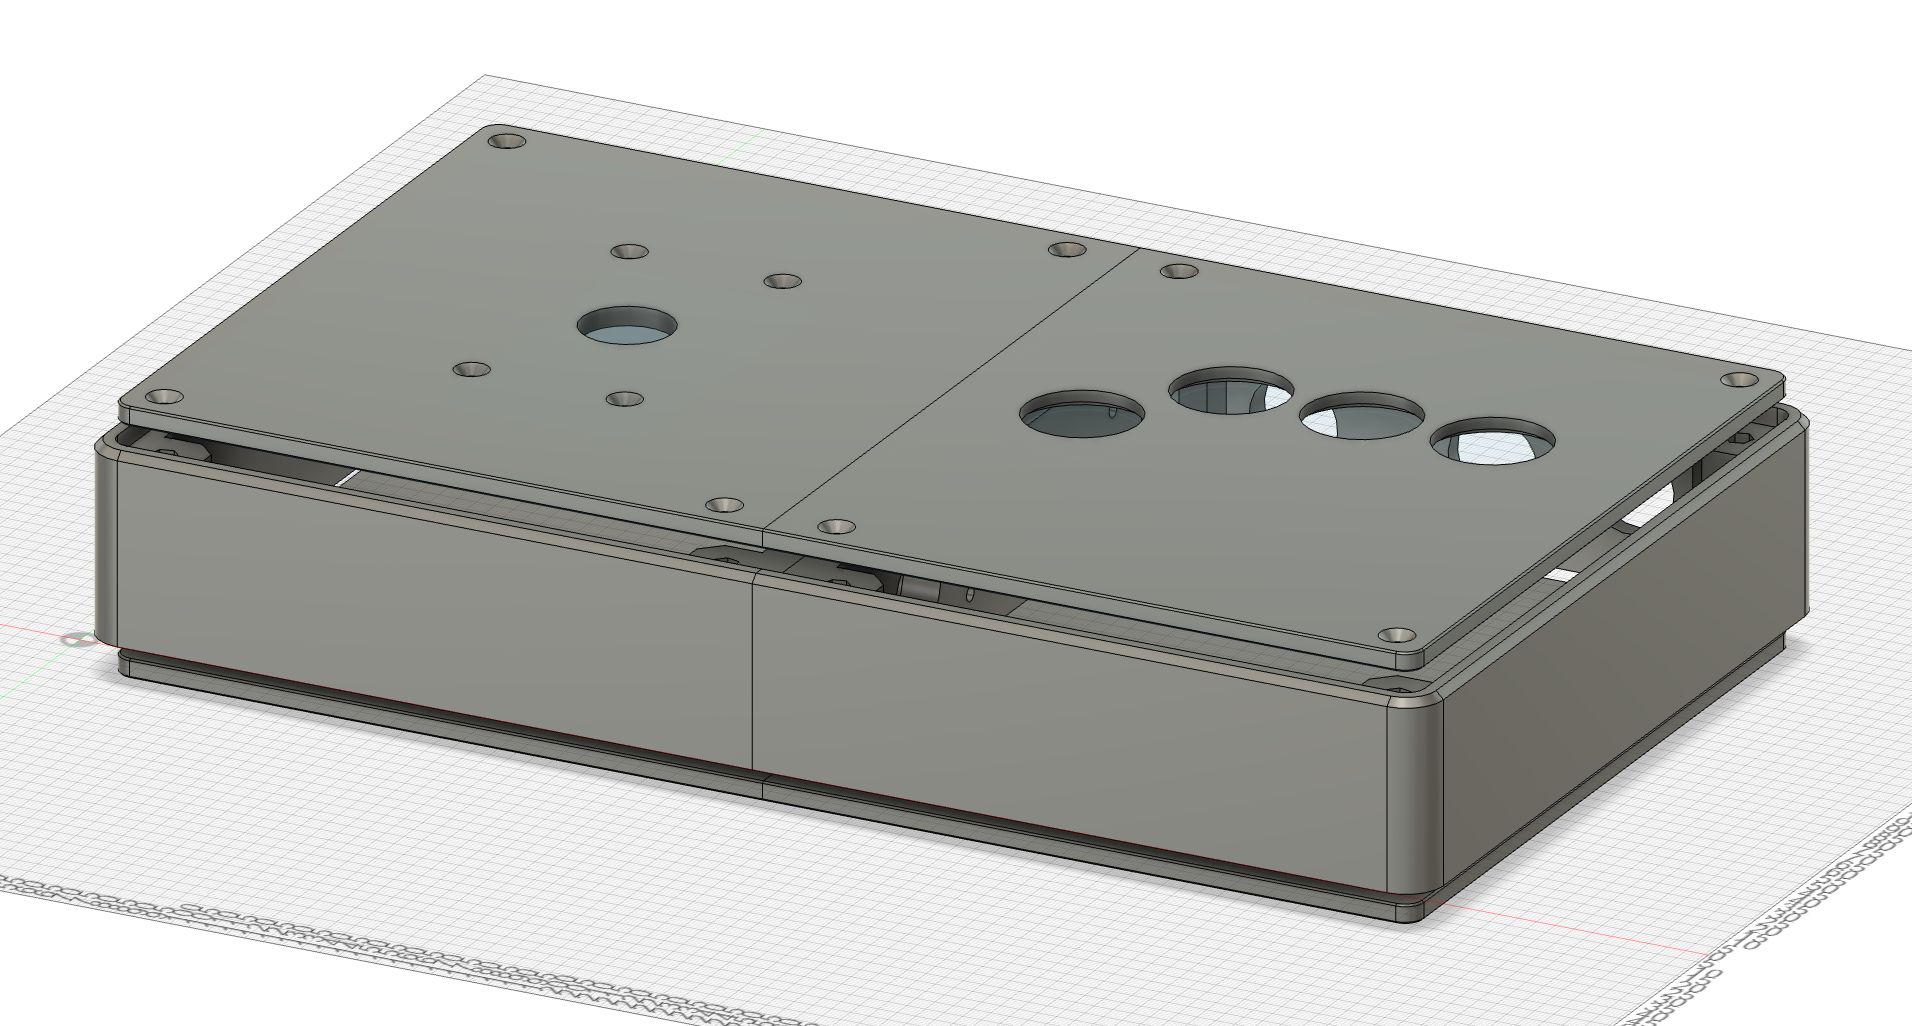
The goal of this project was to create a high quality fightstick case that could be printed on a 250mm x 250mm print bed in parts.
This project is a work in progress. The files posted have been printed and work without issue. There are improvements that will be made and those files will be posted when I make them.
Please note that I am not taking on requests for other layouts at this time. The STLs posted can be easily edited in TinkerCAD or other programs.
This case was printed on a Bambu Labs X1C and P1P printer with the following changes to settings:
- 3 outer walls (Bambu Lab - 3 Wall loops)
- Hex infill
- 15% infill
- Brim (for the main case frame parts only)
- Tree supports (for the main case frame parts only)
Based on my prints you can make an entire case from a single roll of filament.
This case was printed using Bambu Labs matte PLA filament, I have not tested it with other filament.
The following hardware is needed to assemble the case:
- 8 x M4 45mm brass standoffs
- 20 x M4 12-16mm countersunk hex bolts
- 8 x M4 25mm button top hex bolts
- 12 x M4 flange nuts
- 4 x M3 8mm button top hex bolts
- 2 x M3 12mm countersunk hex bolts
- 2 x M3 nuts
Assembly:
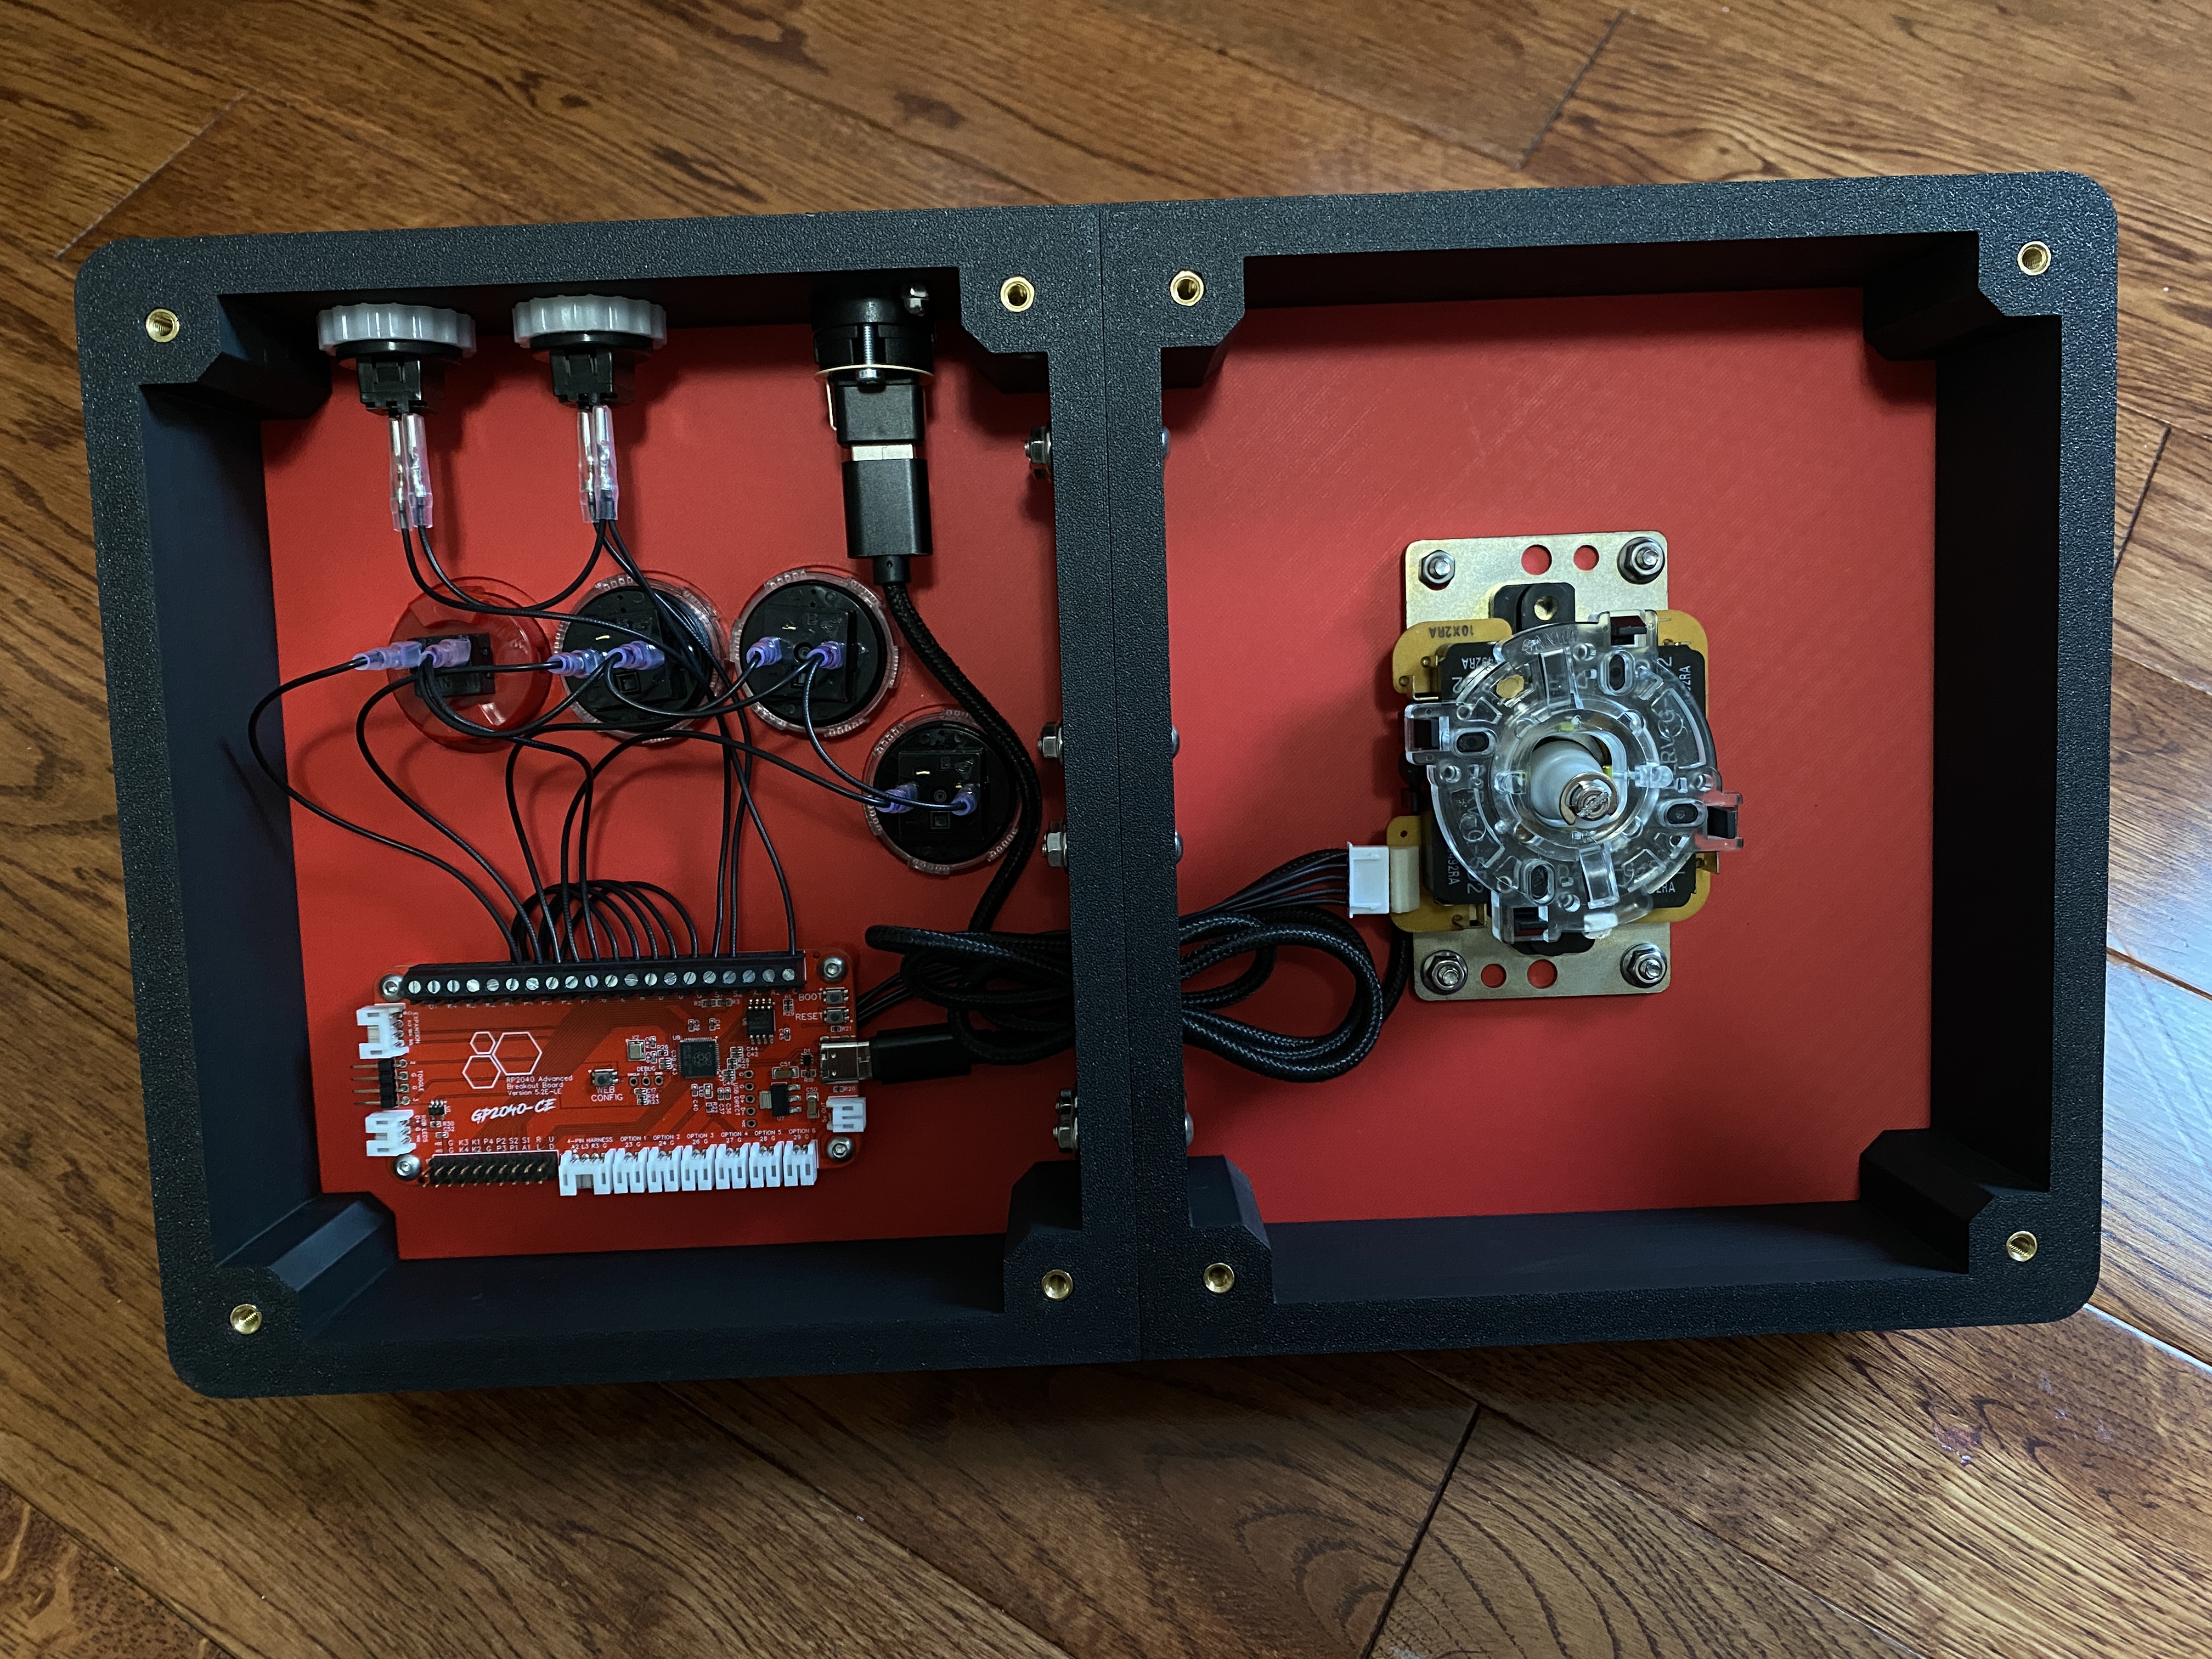
- The M4 45mm brass standoffs slide into the 8x hex sockets in the left and right main frame. If these are tight please use a camp to force them in. Do not heat them for inserting. Future revisions will use an M4 heat insert.
- The M3 bolts are used to secure the PCB to the right top panel. Currently these just screw directly into the plate. Future revisions will use an M3 heat insert on the top plate.
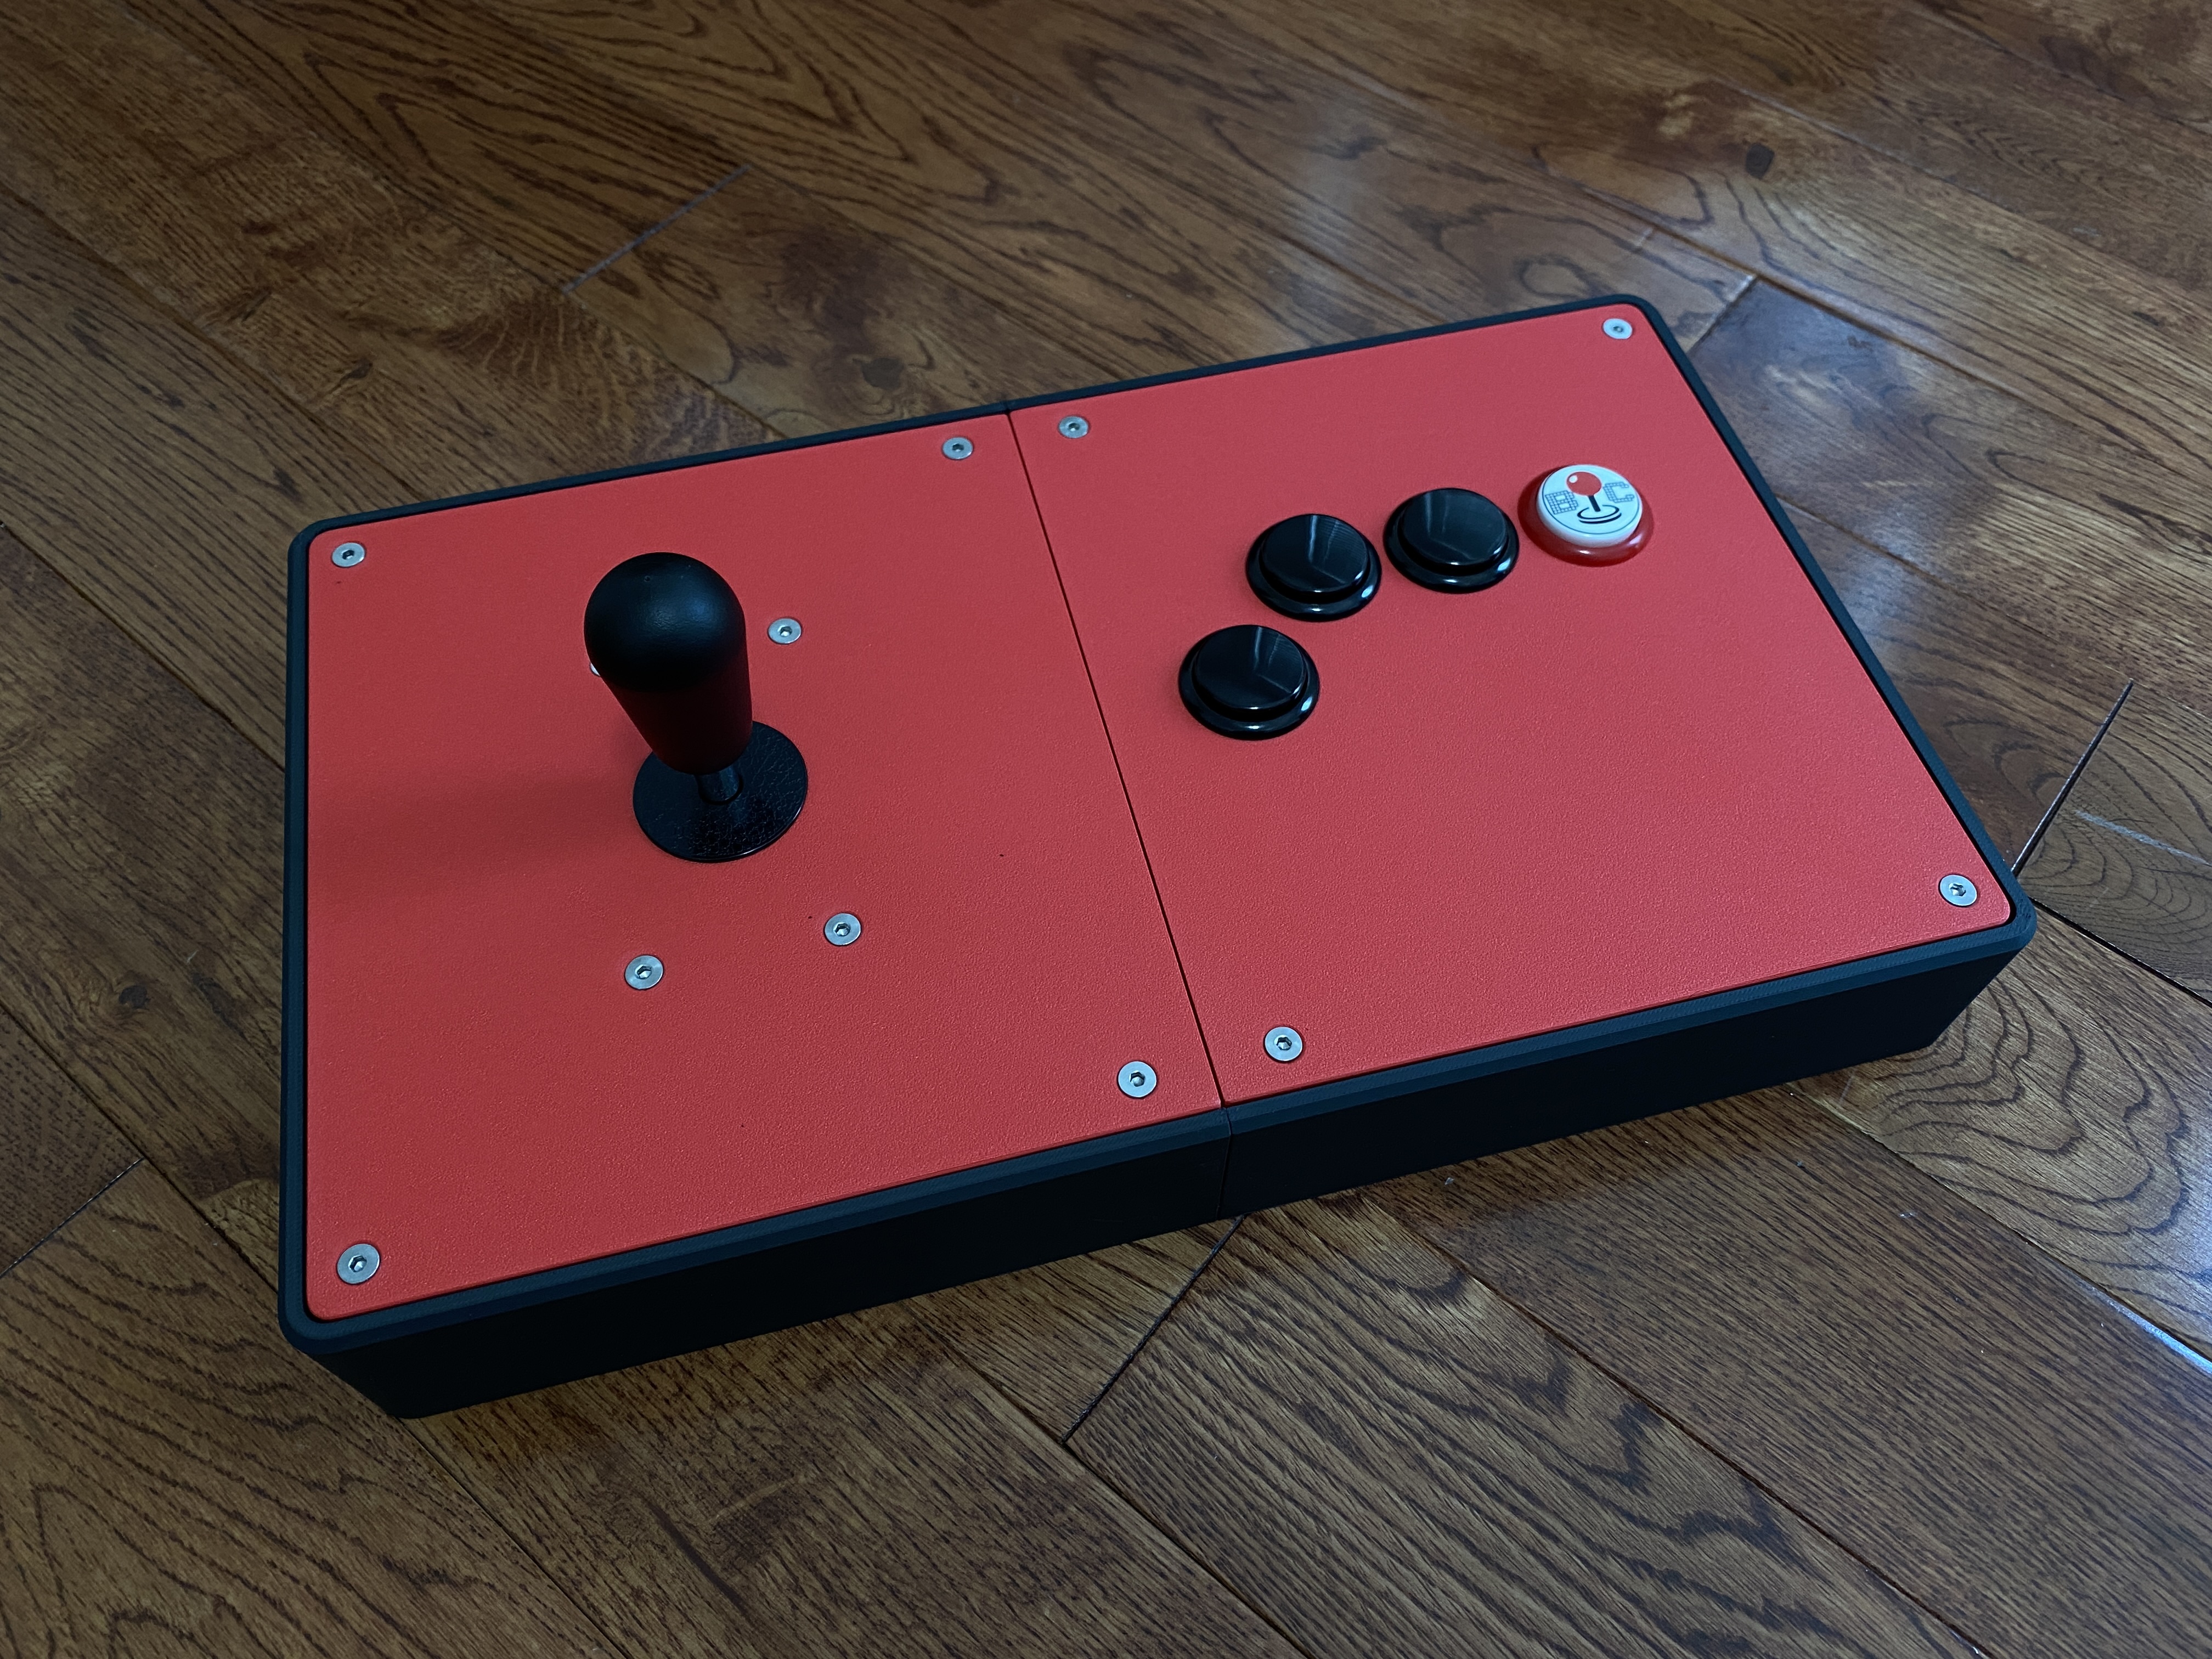
- Four of the M4 12-16mm countersunk hex bolts are used to secure a Sanwa JLF or similar type joystick to the left top panel. This has space in it for a second JLF type dust washer. The JLF is then secured with 4x M4 flange nuts.
- The two case halves are secured with 8x M4 25mm button top hex bolts and 8x M4 flang nuts. The direction of these bolts is not important. While normal nuts can be used flange nuts are recommend.
- The remaining 16 M4 12-16mm bolts are used to secure the top and bottom plates to the unit. You can use many sizes here due to the 45mm standoffs being used. It is possible to convert this to an art case. To do that you can replace 8x or 4x of the top plate countersunk bolts with button top bolts. Doing this would also require modifications to the top plate files to make the holes non-countersunk.
- To mount a Neutrik passthrough you will need the 2x M3 12mm countersunk hex bolts and 2x M3 nuts. The Neutrik passthrough will be a tight fit and may need to be clamped into place.
These files are not posted with the intention of making money. If you enjoy them and want to toss me a few bucks it will go toward filament and parts that will be used to make more cool stuff that gets posted.
All donations or tips will be split evenly between myself and Dash n'Mash.