Usage – User interface
This page will give an introduction into how to use the user interface provided together with the simulation framework. For a more technical view and to learn how to configure the underlying API and webserver, please refer to this page.
Users that do not have a powerful GPU on their local machine might want to deploy their experiments, especially the training task, on a more powerful, remote machine with GPU support. In order to do enable this, we came up with a simple networking setup which allows users to configure, start and monitor experiments remotely.
The user interface can be used to configure, start and manage most of the tasks available through the recommerce simulation framework. We will refer to the tasks as experiments in the context of remote deployment. The underlying webserver will handle all API calls for the user when interacting with the user interface.
When running multiple experiments, they should not interfere with each other. To offer complete isolation, each experiment will be started using a docker container. When working remotely, the necessary setup for docker is already done. For a local setup guide, please refer to this page.
TODO: Add section in developer guide page about creating users and link it here!
After logging in, you will be redirected to the start page of the user interface.

From here, go to configuration to configure your first experiment.
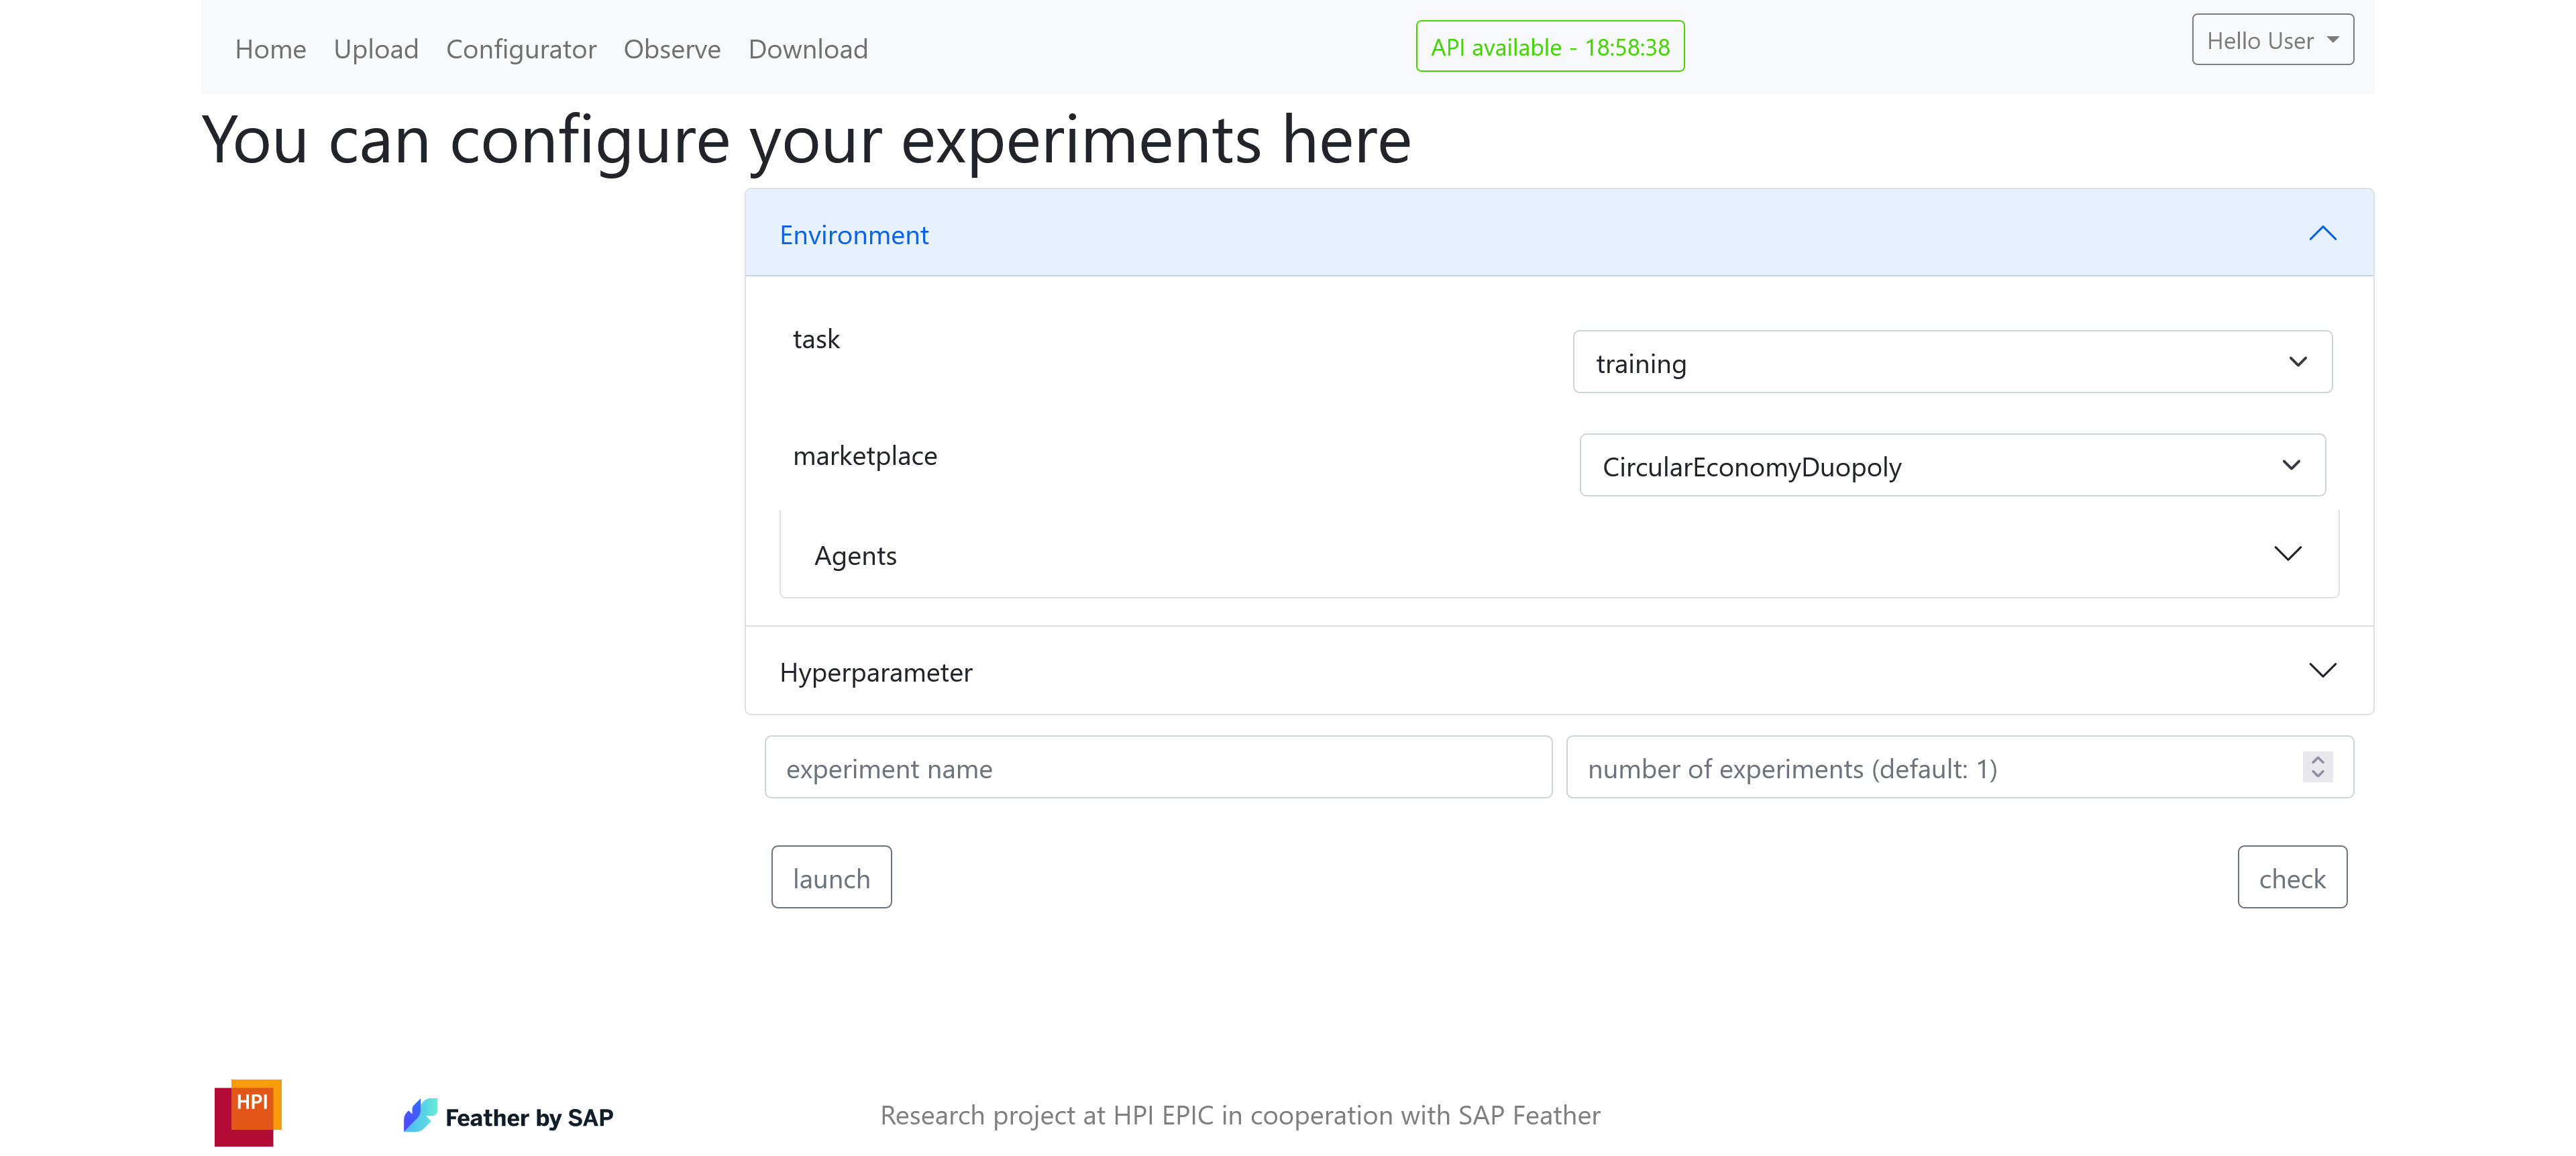
This form represents the configuration files (see configuration).
Fill in the fields, select your preferred marketplace and set suitable agents and competitors.
To check if the given configuration is valid press the check button.
Furthermore, you can set a name for the experiment and the number of experiments that should be run with this configuration.
If you do not modify this field, one experiment will be run by default.
If no name is provided, a random name will be set for the experiment.
Take a look at the top of the navigation bar to see if the API is available.
The API is necessary to start a container on the remote machine.
When everything is set, click the launch button to start the experiment.
When a container was successfully started, you will be redirected to the observe page.
This might take a while.

That's it, you started your first experiment! Now it's time to analyze what's going on within your training session.
On the observe page, click on the name of your experiment.
This will redirect you to the detail page for this specific experiment.

There are several buttons that can be used to check what's going on within the container.
The check_health button will return the current status of the docker container.
This can be one of the docker status', see the docker documentation for more information.
The pause button will pause the container.
On a paused container, this button will turn into an unpause button to resume this container.
With the help of several download buttons, it is possible to download the results folder of the simulation either as a .zip or as a .tar archive.
Furthermore, the config button will download the cofiguration file of this container as .json.
To see the commandline output of the container, press the logs button.
The stop and archive button will remove the container from the remote machine.
It will however still be in the database of the webserver.
For more insights in the training process, use the tensorboard button.
This will open a TensorBoard session in a new tab.
It might take a while for the TensorBoard to load.
Besides configuring, starting and observing containers, there are more features that help you improve your workflow for training agents with the recommerce framework.
Filling in the configuration form on the configurator page might be very tedious and time consuming.
Therefore, the prefill functionality might help you.
Once you successfully started a container, its config is saved and will be available for you to prefill the form with the existing data.
To do so, go to the configurator page and select one or multiple configurations from the left column, that should be used to prefill the form values.
Press the prefill button and all values will be inserted in the form.
Please be cautious when prefilling, as the list of agents will just be appended, so the first visible agent will never change.
On the upload page, you can upload own complete config files, as eell as partially complete files in .json format.
Please refer to this page for a detailed description of the format these files should have.
Once you uploaded files here, they will be available for the prefill functionality as well.
On the download page it is possible to download the containers' data.
TODO: implement this/link a relevant issue and mention it is still being worked on
This is possible even after the container has already been stopped and removed from the remote machine. Furthermore, you can remove the container from the database on this page.