-
Notifications
You must be signed in to change notification settings - Fork 47
XML Based UIs
Although creating UI components in code is fine, it is a little laborious and prone to problems in UI definition and maintenance. XML, on the other hand, is a great way to create interfaces in HaxeUI (and in general). It neatly allows the decoupling of user interface definition and layout from the applications internal logic. This section will look at the options available in HaxeUI that allow user interface creation in XML mark up alone.
The following snippet is a new version of the "Hello World" example used previously, however, this time we will create our user interface components (just a button in this case) via XML, then attach events and finally add it to the root. Later controllers can be used to further add re-usability to this workflow.
First lets start with the XML. Simply create a file called "hello-world.xml" and add components into that file so they match the contents below
<?xml version="1.0" encoding="utf-8" ?>
<button text="Click Me!" x="100" y="100" />
As could be inferred this is simply the definition for a single button placed at the position 100:100 with a text label of "Click Me!".
The next step is simply to load that definition and let the toolkit process it, this is done using the toolkits processXmlResource function, similar to:
Toolkit.processXmlResource("assets/hello-world.xml");The return value of this function could be a few different things (including null) depending on what is encountered in the xml. For now we will assume that it will be UI component (and therefore classes that implement the IDisplayObject interface).
Once the return value has been obtained then it is simply a matter of attaching events to the returned button and finally adding it to the root. This is done much the same as if you were writing it all in code manually, the full example can been seen below. Of course this is an extremely basic example, for something with a little more meat jump to a less trivial example.
The full example is listed below and will functionally result in an identical application as the one listed here.
import haxe.ui.toolkit.controls.Button;
import haxe.ui.toolkit.core.Root;
import haxe.ui.toolkit.core.Toolkit;
import haxe.ui.toolkit.themes.GradientTheme;
import haxe.ui.toolkit.events.UIEvent;
import haxe.ui.toolkit.resources.ResourceManager;

class Main {
    public static function main() {
        Toolkit.theme = new GradientTheme();
        Toolkit.init();

        Toolkit.openFullscreen(function(root:Root) {
            var button:Button = Toolkit.processXmlResource("assets/hello-world.xml");
            button.addEventListener(UIEvent.CLICK, function(e:UIEvent) {
                e.component.text = "You clicked me!";
            });
            root.addChild(button);
       });
    }
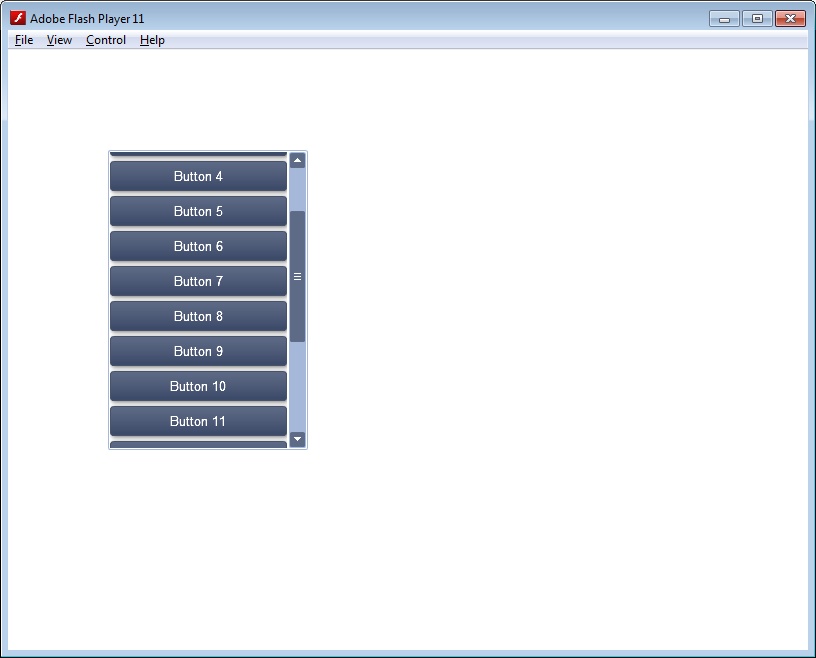
}This snippet, though still basic in application terms shows a slightly better example of how to use XML UIs. Simply it is a ScrollView that contains a VBox, that in turns contains enough Buttons to make the view scroll.
<?xml version="1.0" encoding="utf-8" ?>
<scrollview x="100" y="100" width="200" height="300">
    <vbox width="100%">
        <button text="Button 1" width="100%" />
        <button text="Button 2" width="100%" />
        <button text="Button 3" width="100%" />
        <button text="Button 4" width="100%" />
        <button text="Button 5" width="100%" />
        <button text="Button 6" width="100%" />
        <button text="Button 7" width="100%" />
        <button text="Button 8" width="100%" />
        <button text="Button 9" width="100%" />
        <button text="Button 10" width="100%" />
        <button text="Button 11" width="100%" />
        <button text="Button 12" width="100%" />
        <button text="Button 13" width="100%" />
        <button text="Button 14" width="100%" />
        <button text="Button 15" width="100%" />
        <button text="Button 16" width="100%" />
        <button text="Button 17" width="100%" />
    </vbox>
</scrollview>
And the code to load the UI is simply
import haxe.ui.toolkit.core.interfaces.IDisplayObject;
import haxe.ui.toolkit.core.Root;
import haxe.ui.toolkit.core.Toolkit;
import haxe.ui.toolkit.themes.GradientTheme;

class Main {
    public static function main() {
        Toolkit.theme = new GradientTheme();
        Toolkit.init();

        Toolkit.openFullscreen(function(root:Root) {
            var view:IDisplayObject = Toolkit.processXmlResource("assets/scroll-view.xml");
            root.addChild(view);
        });
    }
}
- Getting Started
- Hello World Example
- Using Multiple Roots
- XML Based UIs
- Styling
- Using Themes
- Using Popups
- Using Layouts
- Using Controllers
- Dynamic Values
- Events and Handlers
- Custom Components
- Custom Layouts
- Buttons
- Calendars
- Checkboxes
- Images
- Menus
- Optionboxes
- Progressbars
- Scrollbars
- Sliderbars
- Spacers
- Tabbars
- Text Fields
- Text Inputs